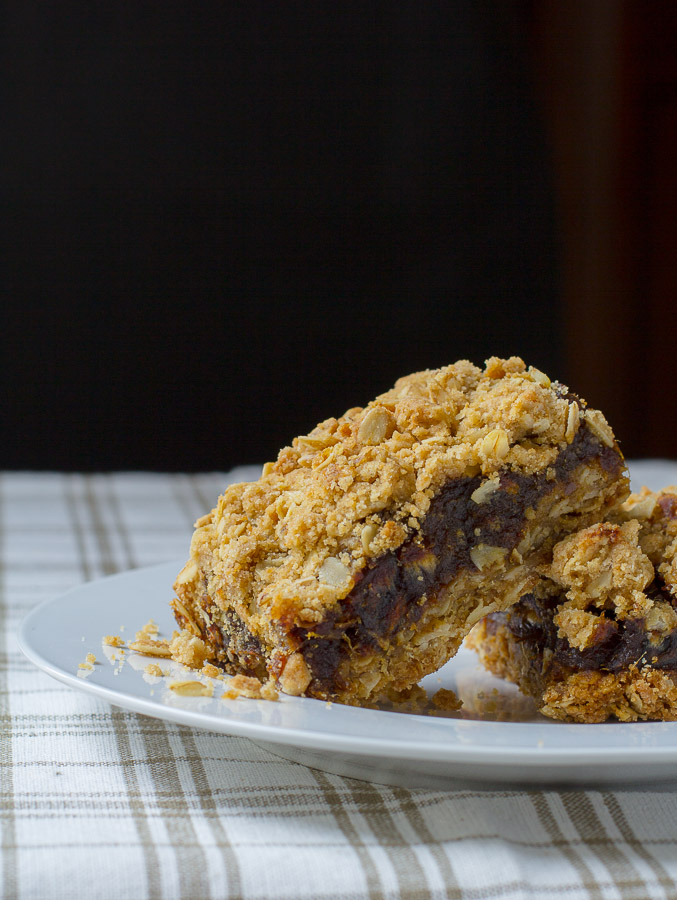
The Best Old-Fashioned Date Squares
/Welcome to baking season!
Have I got a treat for you today!
This is a classic Canadian dessert bar. There's something very satisfying about a good date square. Delicious pureed dates sandwiched between two layers of buttery oatmeal crumb crust. Sigh...I can almost smell them baking away in the oven right now. You're going to love these!

The great thing about this recipe is that you can whip them up really fast and have them in the oven baking in no time. These really are the best date squares I've ever had!
This recipe comes from my grandmother's collection that was passed down to my mom. It's been in the family for a long time now and is one of those special recipes that never goes out of style. I've heard so many stories from my dad about all the amazing desserts and things my grandmother used to make. Her homemade fudge was something that people from the town of Douro used to line up at her front door for. I'm also told that her chocolate cakes were something to die for. I must search out more of her recipes. I never got the chance to try her baking as she passed away when I was very young, but I thank you 100 times and more for this dessert bar Grandma xxx.
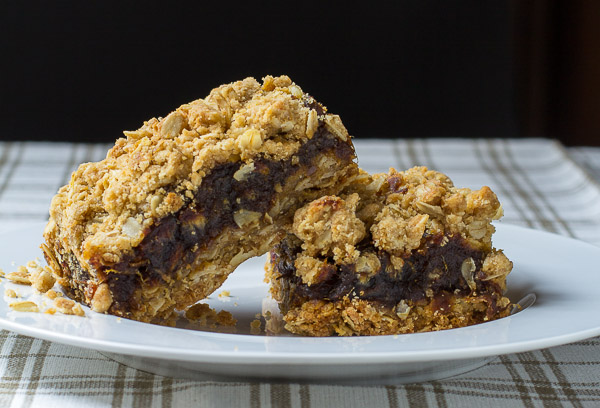
The Best Old-Fashioned Date Squares yield: 16 squares
Ingredients:
oat crumble
- 1 1/2 cups all-purpose flour
- 1 2/3 cups rolled oats
- 1 cup brown sugar
- 1 tsp baking soda
- 1 tsp salt
- 3/4 cup softened butter
date filling
- 1 lb. dates
- 1 cup hot water
Directions:
- In a large mixing bowl, combine flour, oats, sugar, baking soda, and salt. Stir in softened butter until fully incorporated. The mixture should resemble course crumbs.
- For the date filling, combine dates and hot water in a saucepan. Bring to a gentle boil, reduce heat and cook, stirring often until dates are soft and begin to thicken.
- Press half of the crumb mixture into the bottom of an 8 x 8-inch baking pan to form the bottom crust.
- Press the date filling over the bottom crust.
- Sprinkle remaining oat mixture over date filling. Lightly pat down with your fingers to even out the topping.
- Bake at 325˚ for 30 minutes until the top is lightly browned and golden.
- Cool completely and cut into squares.

If you're looking for some more amazing dessert bars, I've got a killer recipe for Magic Bars right here!
I'll be back next week to share some more holiday goodies!