Homemade Peanut Butter Cookie Larabars

There's nothing like waking up to the sound of the bird's chirping. Even if it's dull, dark and rainy like it has been, I can always count on the sounds of spring to pick my spirits up. Let's just hope we don't have anymore unpredictable weather coming our way.

Peanut Butter Larabars

You might already know how much I love nut butter. Particularly almond and peanut. So naturally my favourite Larabar is the peanut butter cookie. I'm really into making my own, they're fun to make (I might be the only one who thinks this ;) and it's cheaper.

Peanut Butter Cookie Larabar recipe

Homemade peanut butter Larabars

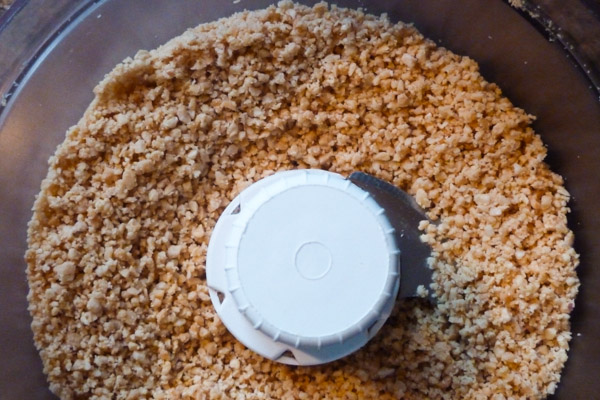
A little trick I like to use when making my own Larabars, is to grind the nuts and dried fruit separately and then combine them along with any flavouring's like spices and sea salt. This way you get a nice smooth Larabar-esque snack bar. First you grind up the nuts until they resemble fine bread crumbs.

How to make Larabars at home

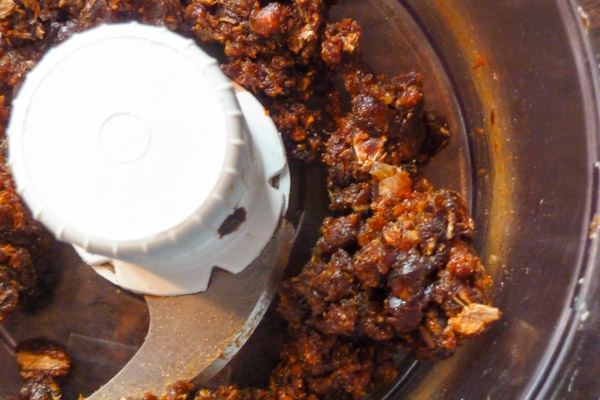
Then you'll want to grind the dates up on their own until you have a sticky, clumpy mess like this.

Peanut Butter Energy Bars

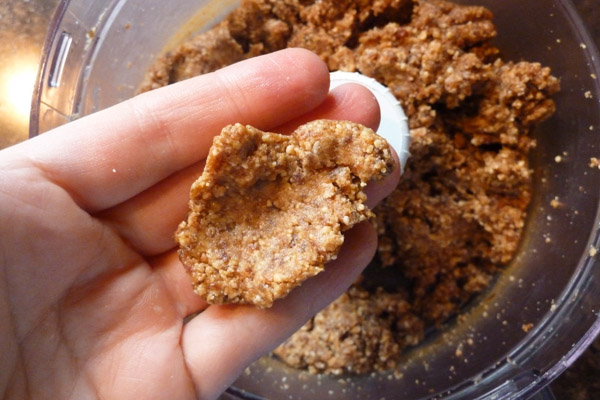
Now you add the ground peanuts along with a pinch of sea salt back in with the dates and grind/process until you can easily form it together with your hands.

Homemade Larabars

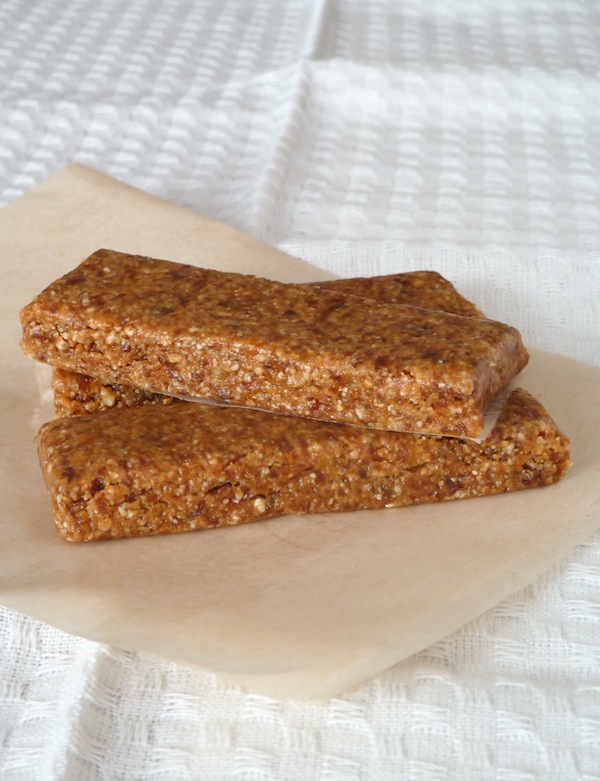
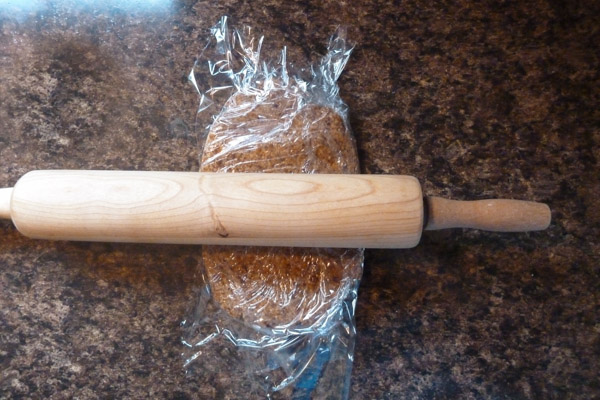
Next up, we form the dough into bars. In the past I've used my hands, but it got so messy that I'd have to keep stopping to wet my fingers and hands just to work with the dough. That was way too time consuming. So I started forming them by covering the dough in saran wrap. This way I can still use my hands to help form the dough and not get them all messy.

I place the clump of dough on a large sheet of saran wrap, cover it up, and roll it out. Brilliant!

Peanut Butter Cookie Larabar Recipe

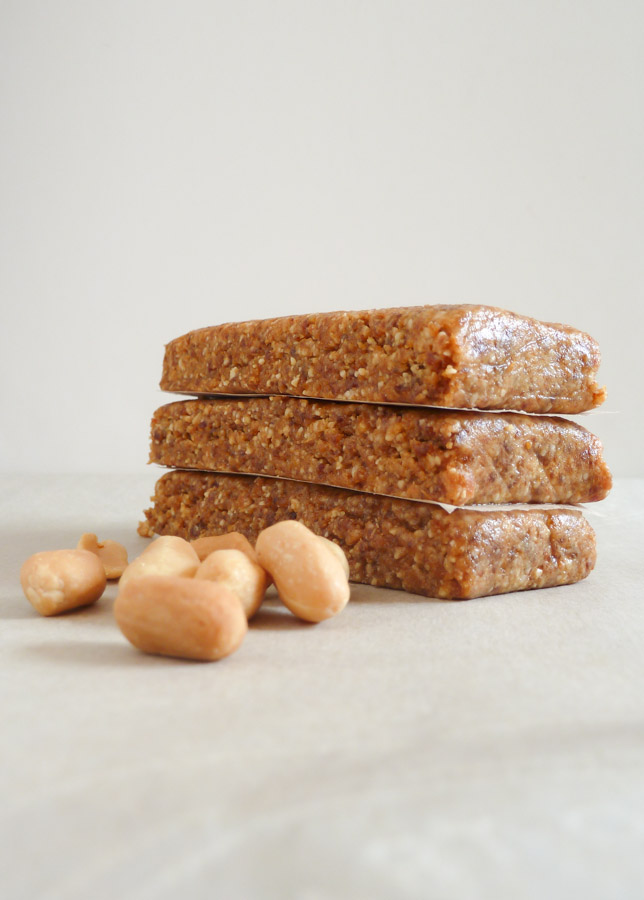
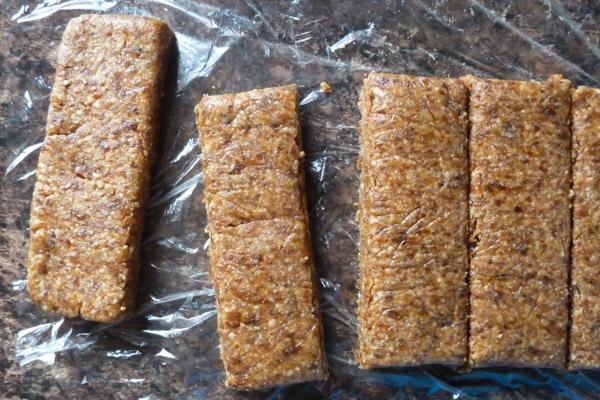
This only takes me 5 minutes to form the bars and cut them.

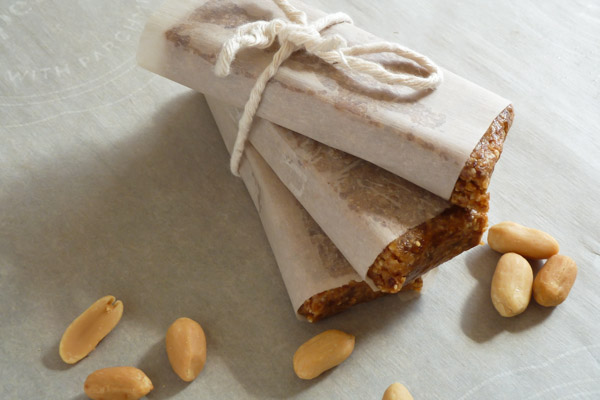
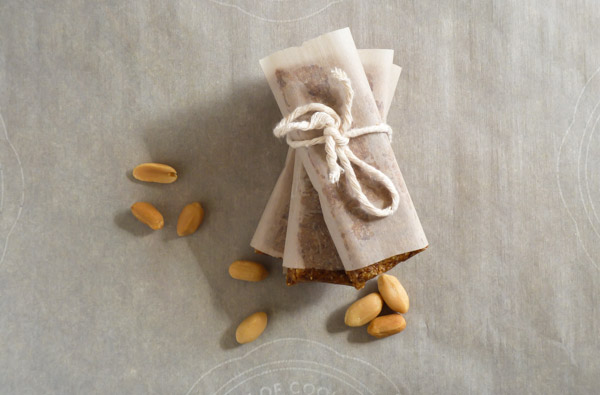
You can wrap them up individually for grab-and-go snacking and work week lunches or store them in a sealed airtight container like I do.

Homemade Larabars

Peanut Butter Cookie Larabars (makes 6, 1x3x1/2" bars) vegan & gluten free

Print or email this

Ingredients:


  • 1 cup pitted dates

  • 1 cup unsalted dry roasted peanuts

  • a pinch of sea salt (no more than 1 gram if you have a kitchen scale handy)


Directions:


  1. In a food processor fitted with a metal blade, blend the peanuts until they are finely chopped. Pour the nuts into a bowl and set aside.

  2. Add the dates to the food processor and process until they start to smooth out and form a paste. Add the chopped peanuts and sea salt and continue blending until evenly combined. It should look similar to a fresh batch of cookie dough.

  3. To form the bars, take a large sheet of saran/cling wrap and lay it flat on the counter. Pour the dough mixture out onto the cling wrap, form it into a ball using your hands, then fold the sides of the cling wrap over the dough so it is covered.

  4. Begin to flatten it out using your hands or a rolling pin, shaping the edges to form a rectangle or square about 1/2" inch thick. Then slice into bars.

  5. Wrap and refrigerate to keep them their freshest.


{Notes}


  • If your food processor is big enough feel free to double the recipe.


Peanut Butter Larabars


No oven needed here!

How To Make Puffed Amaranth Cereal

You want me to make my own cereal?

It sounds a little strange doesn't it? Maybe even like a lot of work. I mean why would anyone want to bother making cereal when they just go to the grocery store and buy a box that has pretty designs and tastes great. . . Have you ever read the ingredients on a box of cereal before?

...Hydrogenated Palm Kernal Oil, Mono -and Diglycerides, Glucose-Fructose, Artificial Sweeteners & Colour/Dyes (red #40, blue #2), BHT preservative, and don't forget all the sugar and salt...My point exactly. After reading an ingredient list like that I wouldn't want to eat it.

Of course there are some cereal brands that are better for you, such as Nature's Path, Erewhon, Barbara's cereal's, and some President's Choice Organics cereals. They still have a lot of sugar though, so I try not to consume boxed cereals too often. 

When I tried popping amaranth for the first time it was quick and way easier than I thought it would be. Instead of cooking the grain in a liquid to make a porridge you pop it in a covered pan over medium-high to high heat. Just like making popcorn! It smells and tastes like it too. It has a really nice nutty flavour. I also highly recommend using it as a salad topping. 

3 tbsp of seed will make about 1 cup of popped amaranth. There's no need to grease the pan. You do however need to make sure that the pan is very hot first before you add the seeds to it. It's also very important to work in small batches; 1-2 tbsp at a time is good. 

Puffed Amaranth (1/4 cup raw = approx. 1 cup) Gluten Free, Vegan, Vegetarian

Print or email this

  • 1/4 cup (4 tbsp) raw amaranth 

Directions: 

  1. Heat a heavy bottomed pot over medium/high heat. The pan is ready to go when a droplet of water evaporates on contact with the surface of the pan.
  2. Once the pot is heated, add the amaranth working in batches of 1 tbsp at a time (this allows for even heating and better popping). Give the pot a quick shake to evenly spread the amaranth. You'll know if you have the right heat setting if it starts to pop within a few seconds. It will finish within 10-15 seconds. 
  3. When the popping begins to slow quickly remove it from the heat and empty it into a bowl.
  4. Return the pot to the stove and let it heat back up againg. Repeat the process until the amount to pop is finished.
  5. Let the puffed amaranth cool completely for storing or consume right away topped with your favourites: milk, berries, nut butter, yogurt, dried fruits, banana etc.

{Notes}

  • Use a heavy bottomed pot that's at least 4 inches deep.
  • If your pot is hot enough, the seeds should start to pop right away once they are added.
  • Cover the pot with a lid! Otherwise it will go everywhere.
  • Work with batches no bigger than 2 tbsp at a time. You'll want a thin, even layer to cover the surface of the pot for even heating. 
  • It may take a few burnt batches to get the hang of it. But don't get discouraged, it's definitely worth it. You just have to figure out the right heat setting for your stove top. 
  • If your amaranth burns instantly, turn down the heat. Your pan is too hot.
  • Just as the popping begins to slow, empty the amaranth into a nearby bowl so it won't have time to burn.

Nutritional Info for a 1 cup serving of puffed amaranth cereal:

It would be a great idea to make a larger batch and store the popped amaranth in a jar or sealed container for convenience. After popping make sure it's cooled completely and then jar it. It'll keep for a couple of months in the fridge.

This is definitely a new favourite that I'm adding to my breakfast line up. 

I thought you all would love to know that you can now buy popped amaranth from 5AM online. I just received my first bag and I was really impressed. The popping is very consistent and just as it should be. It's a great product! Perfect for when you don't feel like doing the work yourself.