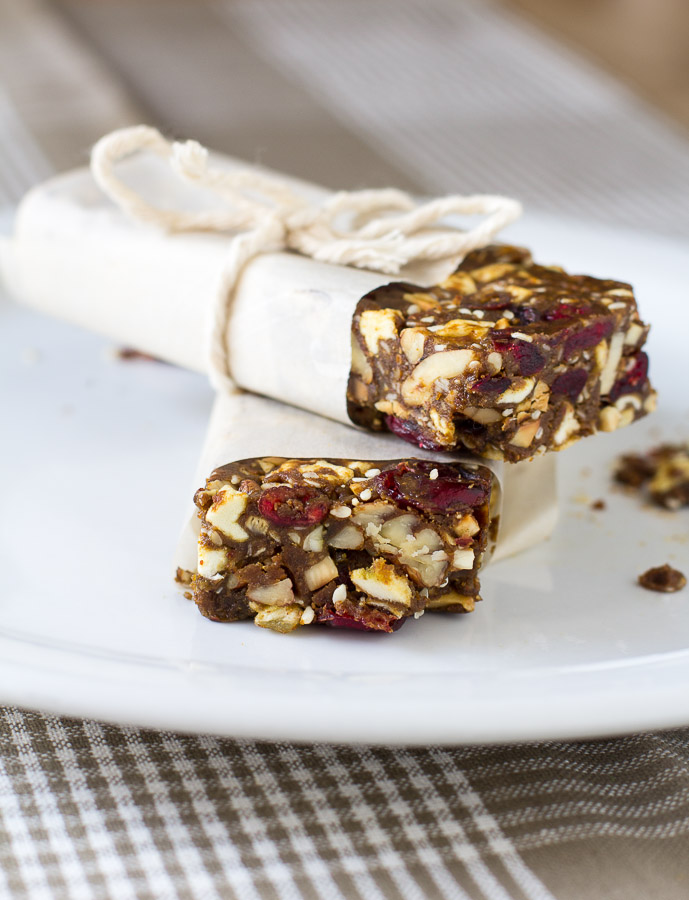
No-Bake Fruit n' Nut Breakfast Bars
/It's Wednesday.
You know what that means? We're half way to the weekend, so Happy hump day!
If you've ever made snack bars at home, you're aware that most of the store-bought one's don't have much in comparison. Larabar's and Vega are awesome though, and no I was not paid to say that.
You've also most likely noticed just how many additives and un-natural ingredients most have. Added preservatives, fillers, colourings, high-fructose corn syrup and other fake processed sugars like maltodextrin...these things are NOT clean. Anything with palm oil is also a no-no. It turns off our natural appetite suppressors grehmlin and leptin.
I usually vote for a sweet breakfast over a savory one. That's what make these the perfect eat clean grab-and-go meal on those days when there's no time to throw breakfast together. We all have those days now and then.
Of course they also double up nicely as a sweet ending to a meal.
These bars will serve you well on day hikes, long drives, and early mornings.
Using toasty nuts in this recipe really add to the flavour of these bars.
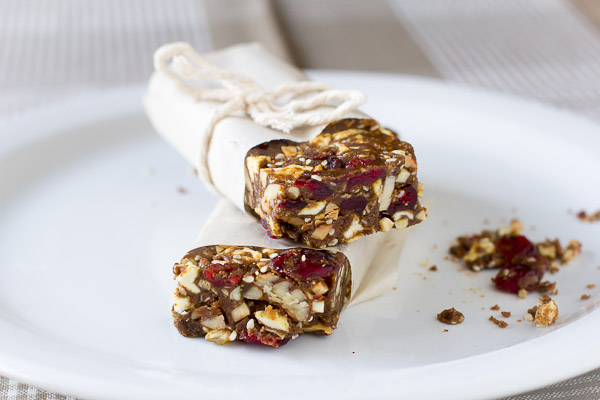
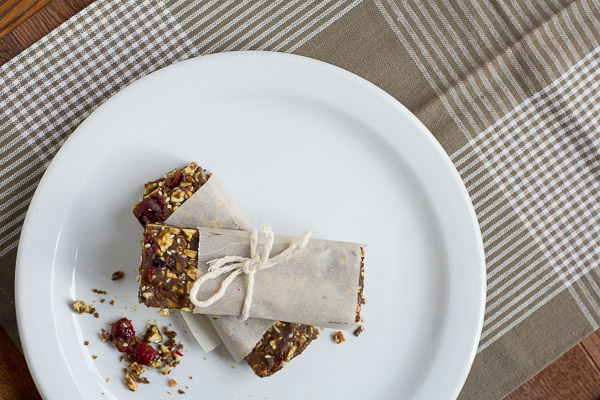
They are grain-free and gluten free, and perfectly chewy, with a bit of crunch from the toasted nuts. If you prefer to use all the same nut instead of a variety feel free.
Adapted from: Eat Clean Diet Cookbook.
No-Bake Fruit n' Nut Breakfast Bars gluten-free, vegan option Yield: 9 bars
Ingredients:
- 1/2 cup raw, unsalted slivered almonds
- 1/2 cup pecans
- 1/4 cup coconut butter
- 1/2 cup natural smooth almond butter
- 2 tbsp blackstrap molasses
- 1 tsp honey, or maple syrup
- pinch sea salt
- 1 tsp pure vanilla extract
- 1 1/2 tsp matcha green tea powder
- 1/4 cup sesame seeds
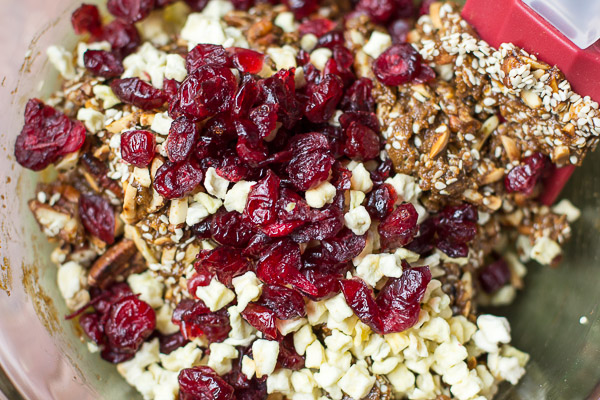
- 1/2 cup dried cranberries
- 1/2 cup chopped dried apple
Directions:
- Toast the nuts: place almonds and pecans in a large frying pan, set on stove top at medium-high heat. Do not add any oil or cooking spray - the nuts have enough oils on their own to cook. Frequently stir or give them a shake until they turn a golden brown and become fragrant. Don't overcook. Remove from burner and let cool for several minutes.
- Transfer nuts to a cutting board or food processor to give them a coarse chop. Set aside.
- In a large mixing bowl, combine coconut butter, almond butter, molasses, honey and sea salt. Heat this mixture over a double broiler just enough to soften the ingredients. Mix well. Remove from heat.
- Add vanilla, matcha green tea, chopped nuts and sesame seeds to butter mixture. Combine well.
- Stir in dried cranberries and chopped dried apple.
- Press into a 8"x4" baking pan.
- Let the dough set in the refrigerator for half an hour.
- Cut into bars. Store in an airtight container or place bars in individual zip-bags so they are ready to go when you are. Keep refrigerated.