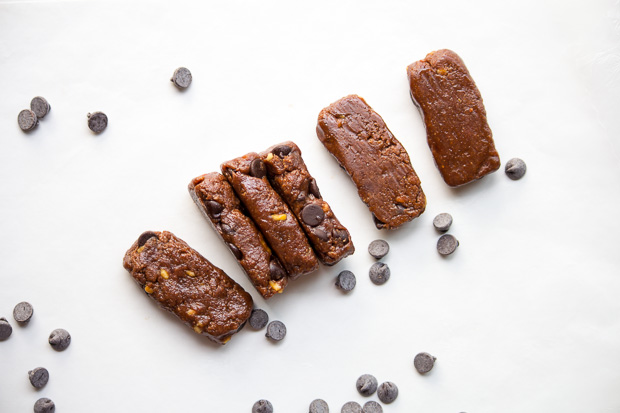
Peanut Butter Cookie Dough Protein Bars
/These peanut buttery protein bars only require 6 ingredients for a healthy, tasty snack to have any time of day! Simply mix the first 5 ingredients together with a spatula and then add the water and mix until you get a doughy texture.
They taste so decadent and rich, but are made from simple, healthy ingredients like crunchy peanut butter, coconut flour and honey.
I'm really loving the new chocolate coconut iso protein 100. Combining it with the other ingredients in these bars is so tasty. I'm totally hooked.


If you like having something sweet these are the perfect cure. They're really good after a meal as a healthy dessert too. I don't know about you guys but I often have an urge for something sweet after dinner ;)
With only 2.7 grams of sugar per serving, the only sweetener in these bars is a little bit of honey. Unless you opt to use 70% dark chocolate, then you will add another gram or two, but I chose to use stevia sweetened chocolate chips this time.


Just a little FYI, in case you guys wondered I mostly use North Coast Naturals ISO Whey Protein 100 in my protein powder recipes. I like the texture and taste it gives them and it has no added sugars, artificial flavours or colours. Plus it only has 1-3 grams of carbs per scoop/ serving. It's some of the best out there! If you can't get your hands on some though you can make these bars using another good quality vanilla whey protein powder.
Peanut Butter Cookie Dough Protein Bars
(makes 6 bars)
Ingredients:
- 1/2 cup (63g) North Coast Naturals chocolate coconut whey protein powder
- 1 tbsp coconut flour
- 1/4 cup (60g) crunchy peanut butter
- 2 tsp honey (10g)
- 20g dark chocolate chips (use stevia sweetened for lower carbs+sugar)
- 4 tsp water
Directions:
- In a small bowl, mix together first five ingredients.
- Add the water and mix thoroughly until a lightly sticky dough forms. If your mixture is too dry, add more coconut flour as needed; if the mix is too wet and more water one tsp at a time.
- Shape the dough into small 6 bars about 1 1/2 inches in length. Store in the fridge. Enjoy!
Nutrition Facts
For one bar: 126 calories, 7g of fat, 1.5g saturated fat, 7g of carbs, 2.3g fiber , 2.7g sugar, 23.3mg sodium, 10.6g of protein